Torque sequence during gasket installation is the order in which a pattern of bolts or fasteners is tightened across a joint or mating surface. It applies mainly to flat gaskets that are mounted between rigid, multi-fastener flanges or bolted cover plates. Applications include fluid lines, pump housings, equipment enclosures, and machine doors.
Unlike flat gaskets, most extruded gaskets are installed by pressing the rubber profile onto the edge of a flange or into a channel. Adhesive tapes can also be used, such as to attach a door gasket to a door jamb. Yet torque sequencing does apply to extruded gaskets (such as some hatch seals) that are joined in a continuous length and attached with a bolted retaining frame.
This article from Elasto Proxy explains the importance of proper torque sequencing during gasket installation. It covers the mechanics of flange loading and provides both step-by-step tightening patterns and practical guidelines for design engineers and installers. Keep reading to learn more and contact Elasto Proxy for gasket fabrication that provides greater value.
Why Torque Sequence Matters
Compressing a flat rubber gasket between two rigid flanges should create continuous, uniform contact across the entire sealing surface. Because rubber is viscoelastic, compression causes the material to “flow” and fill microscopic surface irregularities in the flange faces. Those flange faces might look smooth and straight to the naked eye, but they still contain tiny imperfections.
Compression is critical, but compression alone won’t ensure the continuous, uniform contact that’s needed for proper sealing. Installers who aren’t familiar with proper torque sequencing may fully tighten fasteners in a simple circular order around the perimeter. That can cause the following problems to occur.
- Flange Cocking: The first tightened bolts pull the flange faces tightly together on one side, tilting or “cocking” the mating surface.
- Gasket Pinching and Over-Compression: The rubber under the first few bolts suffers severe over-compression and reaches permanent compression set – a failure mode.
- Gapping and Blowouts: As the installer works around to the opposite side, the cocked flange creates a low-stress area that provides a direct path for fluid or pressure leaks.
Proper torque sequencing keeps the flange faces parallel to each other throughout the installation process. It also distributes the load incrementally, which prevents additional problems.
Standard Torque Sequences
To maintain parallel alignment between mating surfaces, installers need to use specific tightening patterns. As the following sections explain, the torque sequence to use depends on the flange geometry and the number of fasteners.
Circular and Oval Flanges
Use a star pattern torque sequence for circular and oval flanges. The diagram below shows the recommended sequence for a flat gasket with eight bolt holes.
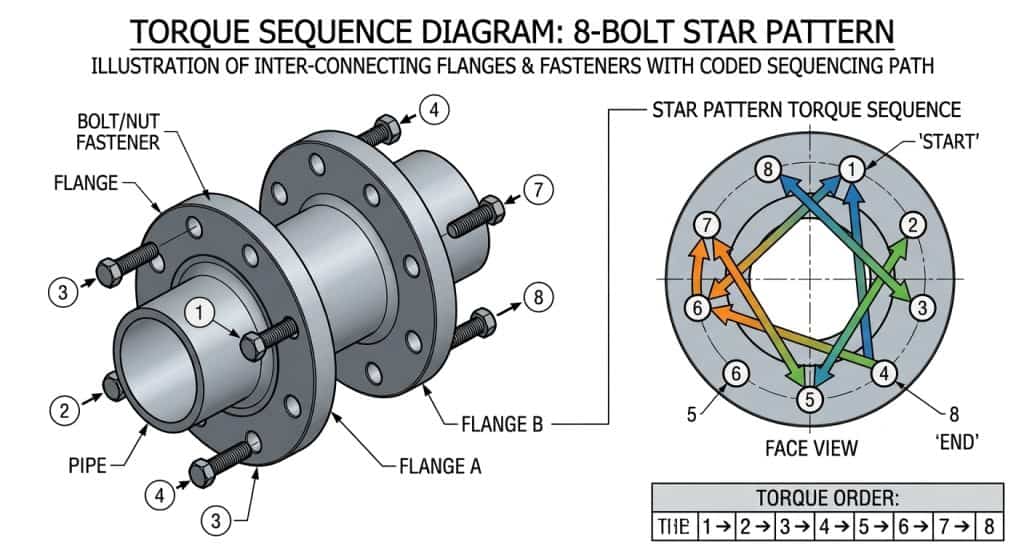
Here are the steps for an installer to follow.
- Start at top center (Bolt 1).
- Move directly across the diameter to bottom center (Bolt 2).
- Move 90 degrees to the left horizontal center (Bolt 3).
- Move directly across to the right horizontal center (Bolt 4).
- Continue in a star sequence across remaining diagonal positions (Bolts 5 through 8).
Rectangular Flanges
Assemblies like electronic cabinets and battery enclosures use rectangular flanges instead of circular or oval ones. Proper torque sequencing begins at the center of the longest sides and works outward toward the corners, as shown in the diagram below.
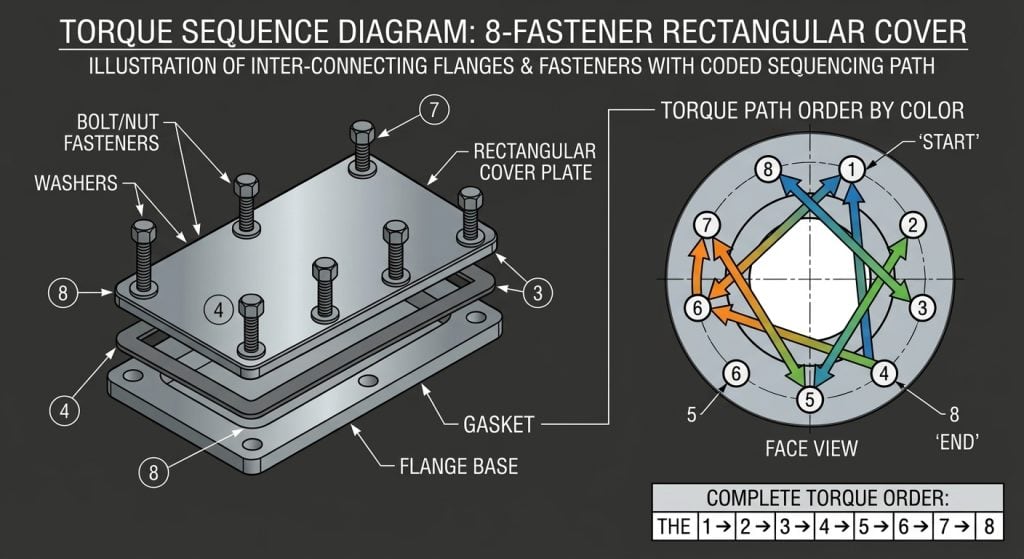
The reason you don’t start at the corners is because that forces excess gasket material toward the center. In turn, this causes the gasket to ripple or buckle. Starting near the midpoint and moving outward pushes the rubber toward the outer edges and helps keeps the gasket flat.
Multi-Pass Torque Sequencing
You don’t need to be a material scientist to know that rubber exhibits stress relaxation (bolt relaxation). Practically speaking, that means rubber gradually yields under an initial mechanical load. Since clamping force decreases within minutes of initial tightening, you’ll need to torque the bolts in multiple passes.
Even with a star sequence, it’s critical for installers to tighten the bolts in multiple passes. Applying full torque in a single step will distort the gasket and potentially lead to seal failure. Instead, apply torque incrementally across multiple passes as shown in the table blow.
Pass | Torque | Goal |
Hand-Tightening | ~10% to 20% | Seat the gasket evenly and square the flange faces. |
Pass 1 | ~30% to 50% | Establish uniform baseline compression. |
Pass 2 | ~80% to 100% | Bring the assembly to full compression load. |
Final Pass | 100% (Rotational) | Verify uniform torque on all bolts in a continuous circular sweep |
Signs of Improper Tightening
How can you tell if there’s a torque sequencing problem? Rubber gaskets that were torqued improperly show visible signs of failure.
- Localized Extrusion / Splitting: Is rubber protruding outward around the bolt holes? That indicates localized over-torquing or non-sequential tightening.
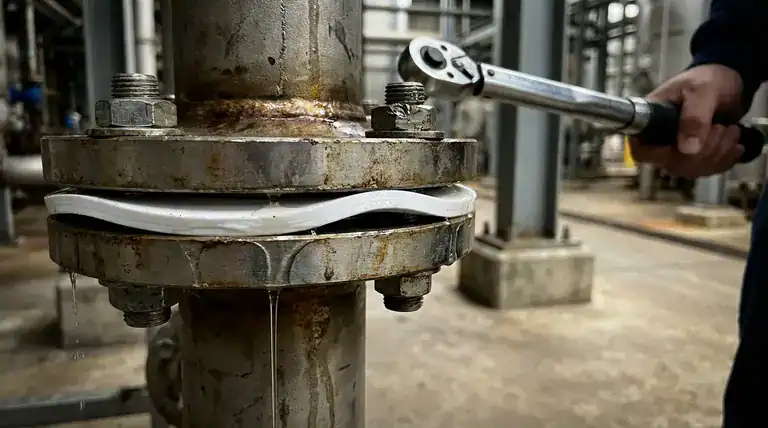
- Wavy Flange Gapping: Is there visible daylight, or is fluid weeping between bolt centers? The bolts were over-tightened and caused what’s known as flange bow.
- Non-Uniform Compression Thickness: Does the thickness of gasket’s edges have varying dimensions? The problem is a cocked flange.
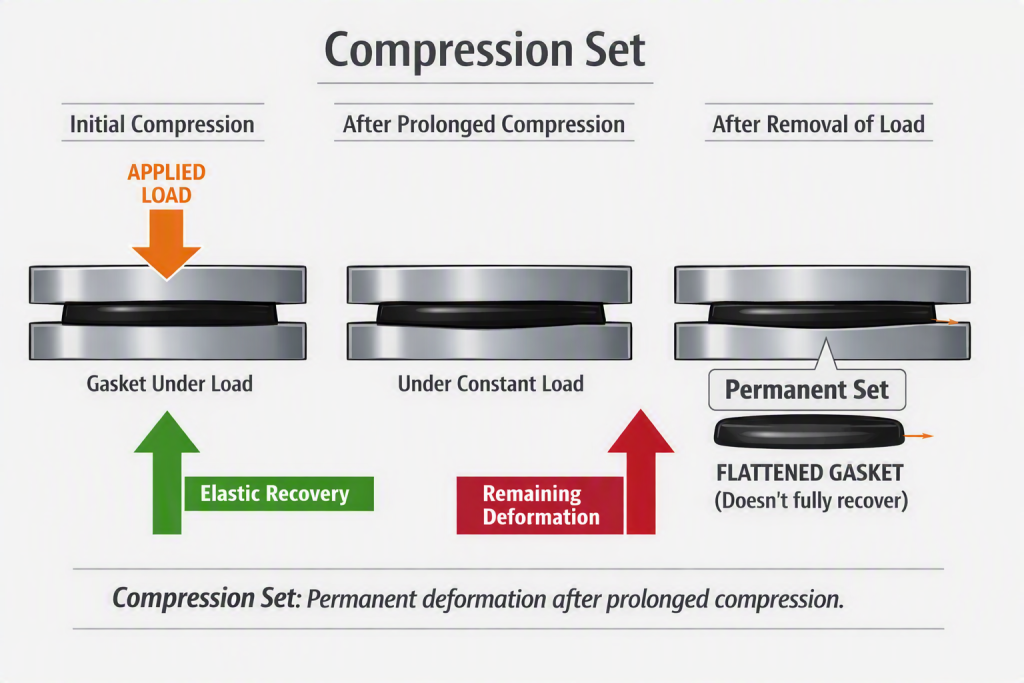
- Compression Set Failure: Does the rubber fail to rebound if you loosen the bolts? That indicates the rubber has reached permanent compression set and won’t bounce back.
Design Guidelines for Engineers
Designing a rubber gasket for reliable installation includes planning for bolt load distribution.
Here’s what engineers need to keep in mind.
- Account for Flange Stiffness and Bolt Spacing: When torqued, thin or flexible enclosure covers will flex between bolt centers. Make sure your bolt spacing is close enough to maintain just enough stress across the midpoint between fasteners.
- Use Torque Limiters or Compression Stop Features: Installers sometimes crush soft rubber gaskets. To prevent this, design flanges with built-in metal-to-metal compression stops or specify molded gaskets with integrated metal torque collars (i.e., washers).
- Specify Torque Values on Engineering Drawings: Don’t leave bolt tightening to chance. Specify target torque values in Newton-meters (N · m) or foot-pounds (ft-lbs) on job instructions. Add the required sequence diagrams as well.
Get Custom Gaskets with Greater Value
Achieving a leak-free seal means evaluating your entire application. It starts with compound and durometer selection, gasket geometry, and flange stiffness, but it also includes installation. Elasto Proxy fabricates both flat gaskets and extruded gaskets, but we don’t stop there. We can provide you with recommendations about the best way to attach or install gaskets, including torque sequencing.
Are you ready to work with a gasket fabricator that provides greater value? Talk to our team.