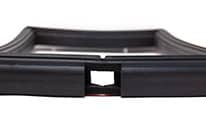
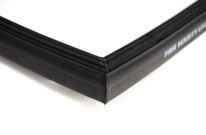
Trim seal installation involves following a series of five steps. There are some prerequisites, too. For example, before you install a trim seal, make sure you’ve selected a rubber product that’s made of the right material for your application and that has the proper measurements. Otherwise, even the best trim seal installation could result in leakage or premature failure.
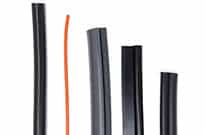
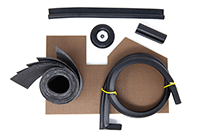
For best results, it’s also important to focus on trim seal fabrication. You can buy coils of rubber that you cut yourself, or you can purchase cut lengths or finished gaskets. Many companies know that they can source rubber products from Trim Lok, but Elasto Proxy supplies trim seals in low-to-medium volumes along with value-added services such as design assistance. Contact us to learn more.
Now that you understand the prerequisites to trim seal installation, here are the five steps to follow.
#1 Start in the middle of a straight length
Start your trim seal installation in the middle of a straight length. Do not begin in a radiused section, or corner, where two straight lengths meet. For example, let’s say that you’re installing a trim seal on an eight-sided door frame for mobile equipment. Pick one of the straight lengths, find the mid-point, and begin your trim seal installation there.
#2 Press but don’t pull to the opposite side
From your starting point, gently press the legs of the trim section over the door frame. It’s important to do so this without pulling and stretching the rubber. Otherwise, you may find that you have some leftover material at the end. Also, don’t press the entire trim seal into place – at least not yet. Rather, install the gasket until you reach the point on the door frame that is opposite to where you began.
#3 Align the rest and meet where you began
From this opposite point, align the rest of the trim seal with the door frame. In other words, line-up the rubber with the edge of the frame but don’t push it into place just yet. This will let you see if you have too much material left over when the two ends of your trim seal meet. As a final part of this step, align the loose end of your trim seal with the end that’s already installed.
#4 Work your way back
Next, press the loose end of your trim seal over the door frame so that it butts up against where you began the installation. In other words, the ends of your trim seal should now both be in the starting position. Then work your way back and gently install the rest of the seal. Push the legs of the trim onto the remaining section of the frame, including the corners.
#5 Finish firmly but without brute force
To finish your trim seal installation, use your hands or a rubber roller to make sure that all of the trim seal is pushed firmly into place. Although this part of the process does not require the use of tools, the use of a rubber roller can reduce hand fatigue – especially if you’re installing many gaskets. Do not, however, use a rubber mallet. The reason we advise against this is that a rubber mallet can break the metal carrier that inside the trim seal. In turn, this reduces its gripping force.
Get Trim Seal Installation Help from Elasto Proxy
Do you need help installing trim seals? When you buy coils of rubber, cut lengths, or finished gaskets from us, Elasto Proxy will provide you with the installation advice that you need. This article and the video below prove it. To request a quote for trim seals, contact us.