Learn how to install finished gaskets by following these tips from Elasto Proxy. We can also answer your questions about gasket installation.
What are finished gaskets?
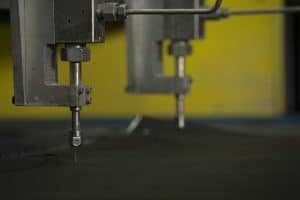
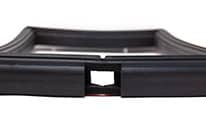
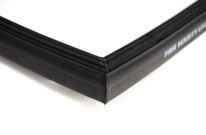
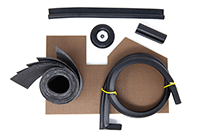
Finished gaskets are custom rubber seals that arrive ready to install. First, rubber profiles are taped with a pressure-sensitive adhesive (PSA) or high-bond adhesive tape (HATS). Next, these taped profiles are cut to length with rubber water jet cutting. If the cut lengths are bonded together, the finished gasket may look like a picture frame or a continuous loop. All of these manufacturing steps are important, but a finished gasket that isn’t installed properly costs you time, money, and frustration.
What can go wrong when you install finished gaskets?
Workers who struggle with finished gasket installation take more to complete their tasks. They may also use tools, such as screwdrivers or wooden mallets, that can tear or damage finished gaskets. Installers may neglect to prepare surfaces adequately, stretch the rubber excessively, or work under the wrong temperature and humidity conditions. Re-positioning a finished gasket that’s been attached doesn’t always work so well either. Rushing the process can also cause problems in the long run.
What are some tips for installing finished gaskets?
There are plenty of things that can go wrong during gasket installation, but the process doesn’t have to be difficult. By following these five tips, you can install finished gaskets like a pro.
- Prepare the surfaces.
- Check the temperature and humidity
- Use two corners and meet in the middle
- Don’t rely on repositioning
- Leave time for curing
Let’s take a closer look.
#1 Prepare the surfaces
Finished gaskets bond to surfaces through adhesion, a chemical process. If a surface is dirty or oily, you won’t get the best bonds. So, clean the surface to which you’ll bond the custom gasket. Don’t use window cleaner or soapy water. Use isopropyl alcohol instead. Because it’s a solvent, rubbing alcohol dissolves dirt and oil. For best results, keep your gaskets clean, too. If you stock finished gaskets on shelves, keep these industrial rubber products in their packaging. Otherwise, warehouse dust may settle on them.
#2 Check the temperature and humidity
To promote adhesion, install taped gaskets at room temperature. This isn’t a specific temperature, but rather a range of temperatures between about 65° and 75° F, or 18° to 23° C. In general, it’s better to install finished gaskets inside a climate-controlled building. You might be able to install custom gaskets under cold-weather conditions, but the bonds probably won’t last as long. Humidity matters, too. Most indoor environments have a relative humidity of around 40%. If you install gaskets when it’s raining (100% humidity) or under tropical, high humidity conditions, the gasket tape might not stick.
#3 Use two corners and meet in the middle
The finished gaskets that you buy are cut to fit your application. Rubber is elastic, however, so excessive stretching can extend the gasket’s length and complicate installation. To avoid this problem, install each end of the gasket in the corners and then install it in the middle. Don’t install your finished gasket in one corner and pull it across the middle until you reach the other corner. If you do, you may find you have too much material and that the gasket won’t fit. With large surfaces, install each end of the gasket in the corners and then at a center point. Then install the gasket from the corners to the center point.
#4 Don’t rely on repositioning
The PSA and HATS tapes that are used with finished gaskets have different adhesive systems. If you need to reposition a gasket, you’ll find that PSA tape is easier to work with. HATS tapes provide stronger bonds but with a tradeoff. If you need to reposition a HATS-taped gasket, you might be able to do it once – or twice if you’re really lucky. That’s why it’s so important to install finished gaskets the right way the first time. Don’t rely on repositioning. Even if you can remove a rubber gasket repeatedly, you’ll cause the tape to lose some of its adhesive properties.
#5 Leave time for curing
The adhesives that are used with gasket tapes require curing, a chemical reaction that’s activated by the air when the tape’s release liner is removed. With PSA tapes, curing happens right away. With HATS tapes, complete curing takes 24 hours. That’s why it’s important to know which type of tape you’re working with. If you’re installing a HATS-taped gasket on a piece of mobile equipment in a climate-controlled shop, don’t move the machine outdoors until curing is complete. Otherwise, bond strength may suffer. Installing finished gaskets the right way takes some planning but the benefits are worth it.
To learn more about how to install finished gaskets, ask Elasto Proxy.